Morjens. Alla lainaus huoltomanuskasta. Pähkinänkuoressa, ruuvit ensin irti ja sitten muoviset kiinnitysnastat varovaisesti irti. Rikki ne kuitenkin tuppaavat menemään jo aika herkästi vanhemmassa autossa. Omassa taitaa olla yksi niistä enää ehjänä, jos sekään... Ovistakin on nuo samat muovinikaleet jo luovuttaneet

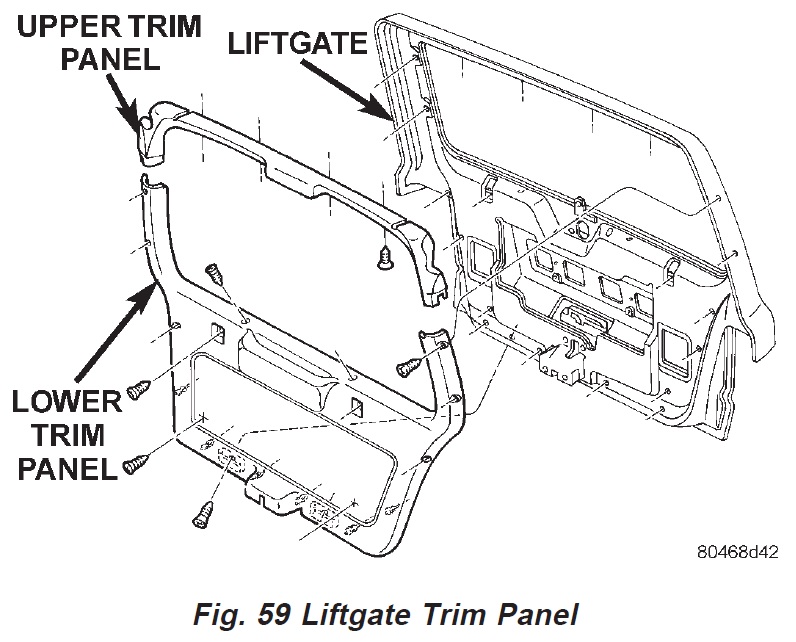
LIFTGATE TRIM PANEL
NOTE:
When removing both trim panels from liftgate,
remove lower trim panel first. When installing both
trim panels, install the upper trim panel first.
UPPER TRIM PANEL REMOVAL
(1) Remove screws attaching upper trim panel to
liftgate (Fig. 59).
(2) Remove screws at upper and lower trim panel
overlap.
(3) Disengage the connector for the rear window
defogger.
(4) Route the wire harness through the trim panel.
(5) Gently, pull trim panel downward. If necessary
rotate trim panel away from glass panel to release
push-in fasteners.
(6) Use a trim panel removal tool to detach
push-in fasteners from liftgate.
UPPER TRIM PANEL INSTALLATION
(1) Position trim panel at liftgate and slide overlapping
portions of trim panel under liftgate lower
trim panel.
(2) Route the wire harness through the trim panel.
(3) Align trim panel push-in fasteners with holes
in liftgate inner panel. Press trim panel upward to
seat fasteners.
(4) Engage the connector for the rear window
defogger.
(5) Install screws at upper and lower trim panel
overlap.
(6) Install screws attaching upper trim panel to
liftgate.
LOWER TRIM PANEL REMOVAL
(1) Remove screws attaching lower trim panel to
liftgate (Fig. 59).
(2) Use a trim panel removal tool to detach
push-in fasteners from liftgate.
LOWER TRIM PANEL INSTALLATION
(1) Position trim panel on liftgate.
(2) Align trim panel push-in fasteners with holes
in liftgate inner panel. Press trim panel inward to
seat fasteners.
(3) Install screws attaching lower trim panel to
liftgate.